
Walrus file is a brand new characteristic launched in Walrus 0.5. It permits you to describe purposes and configure infrastructure sources utilizing a concise YAML.
You may then execute walrus apply within the Walrus CLI or import it on the Walrus UI. This may submit the Walrus file to the Walrus server, which is able to deploy, configure, and handle purposes and infrastructure sources. This makes it simple to reuse them throughout a number of environments.
On this tutorial, we are going to exhibit combine Walrus CLI with GitLab CI and launch purposes through Walrus file to enhance CI/CD pipelines.
Conditions
Earlier than getting began, please put together the next:
- Create a brand new venture on GitLab and import our demo project into it. First, guarantee that you’ve got the GitHub kind
Import Missionpermission enabled. If not, seek advice from the snapshot under and allow it within theAdmin Space. Alternatively, you’ll be able to manually
 git clonethe venture and push a brand new GitLab venture into it. - Set up Walrus through
docker run, and expose further ports 30000~30100 for NodePort of built-in k3s cluster workload, for extra data: https://seal-io.github.io/docs/deploy/standalone
sudo docker run -d --privileged --restart=all the time -p 80:80 -p 443:443 -p 30000-30100:30000-30100 --name walrus sealio/walrus:v0.5.13. Entry Walrus. Within the newest model, Walrus routinely creates a native atmosphere within the default venture and provides built-in K3s or different K8s clusters within the Walrus container as a connector on this atmosphere. For demonstration functions, this instance will use the K3s cluster.
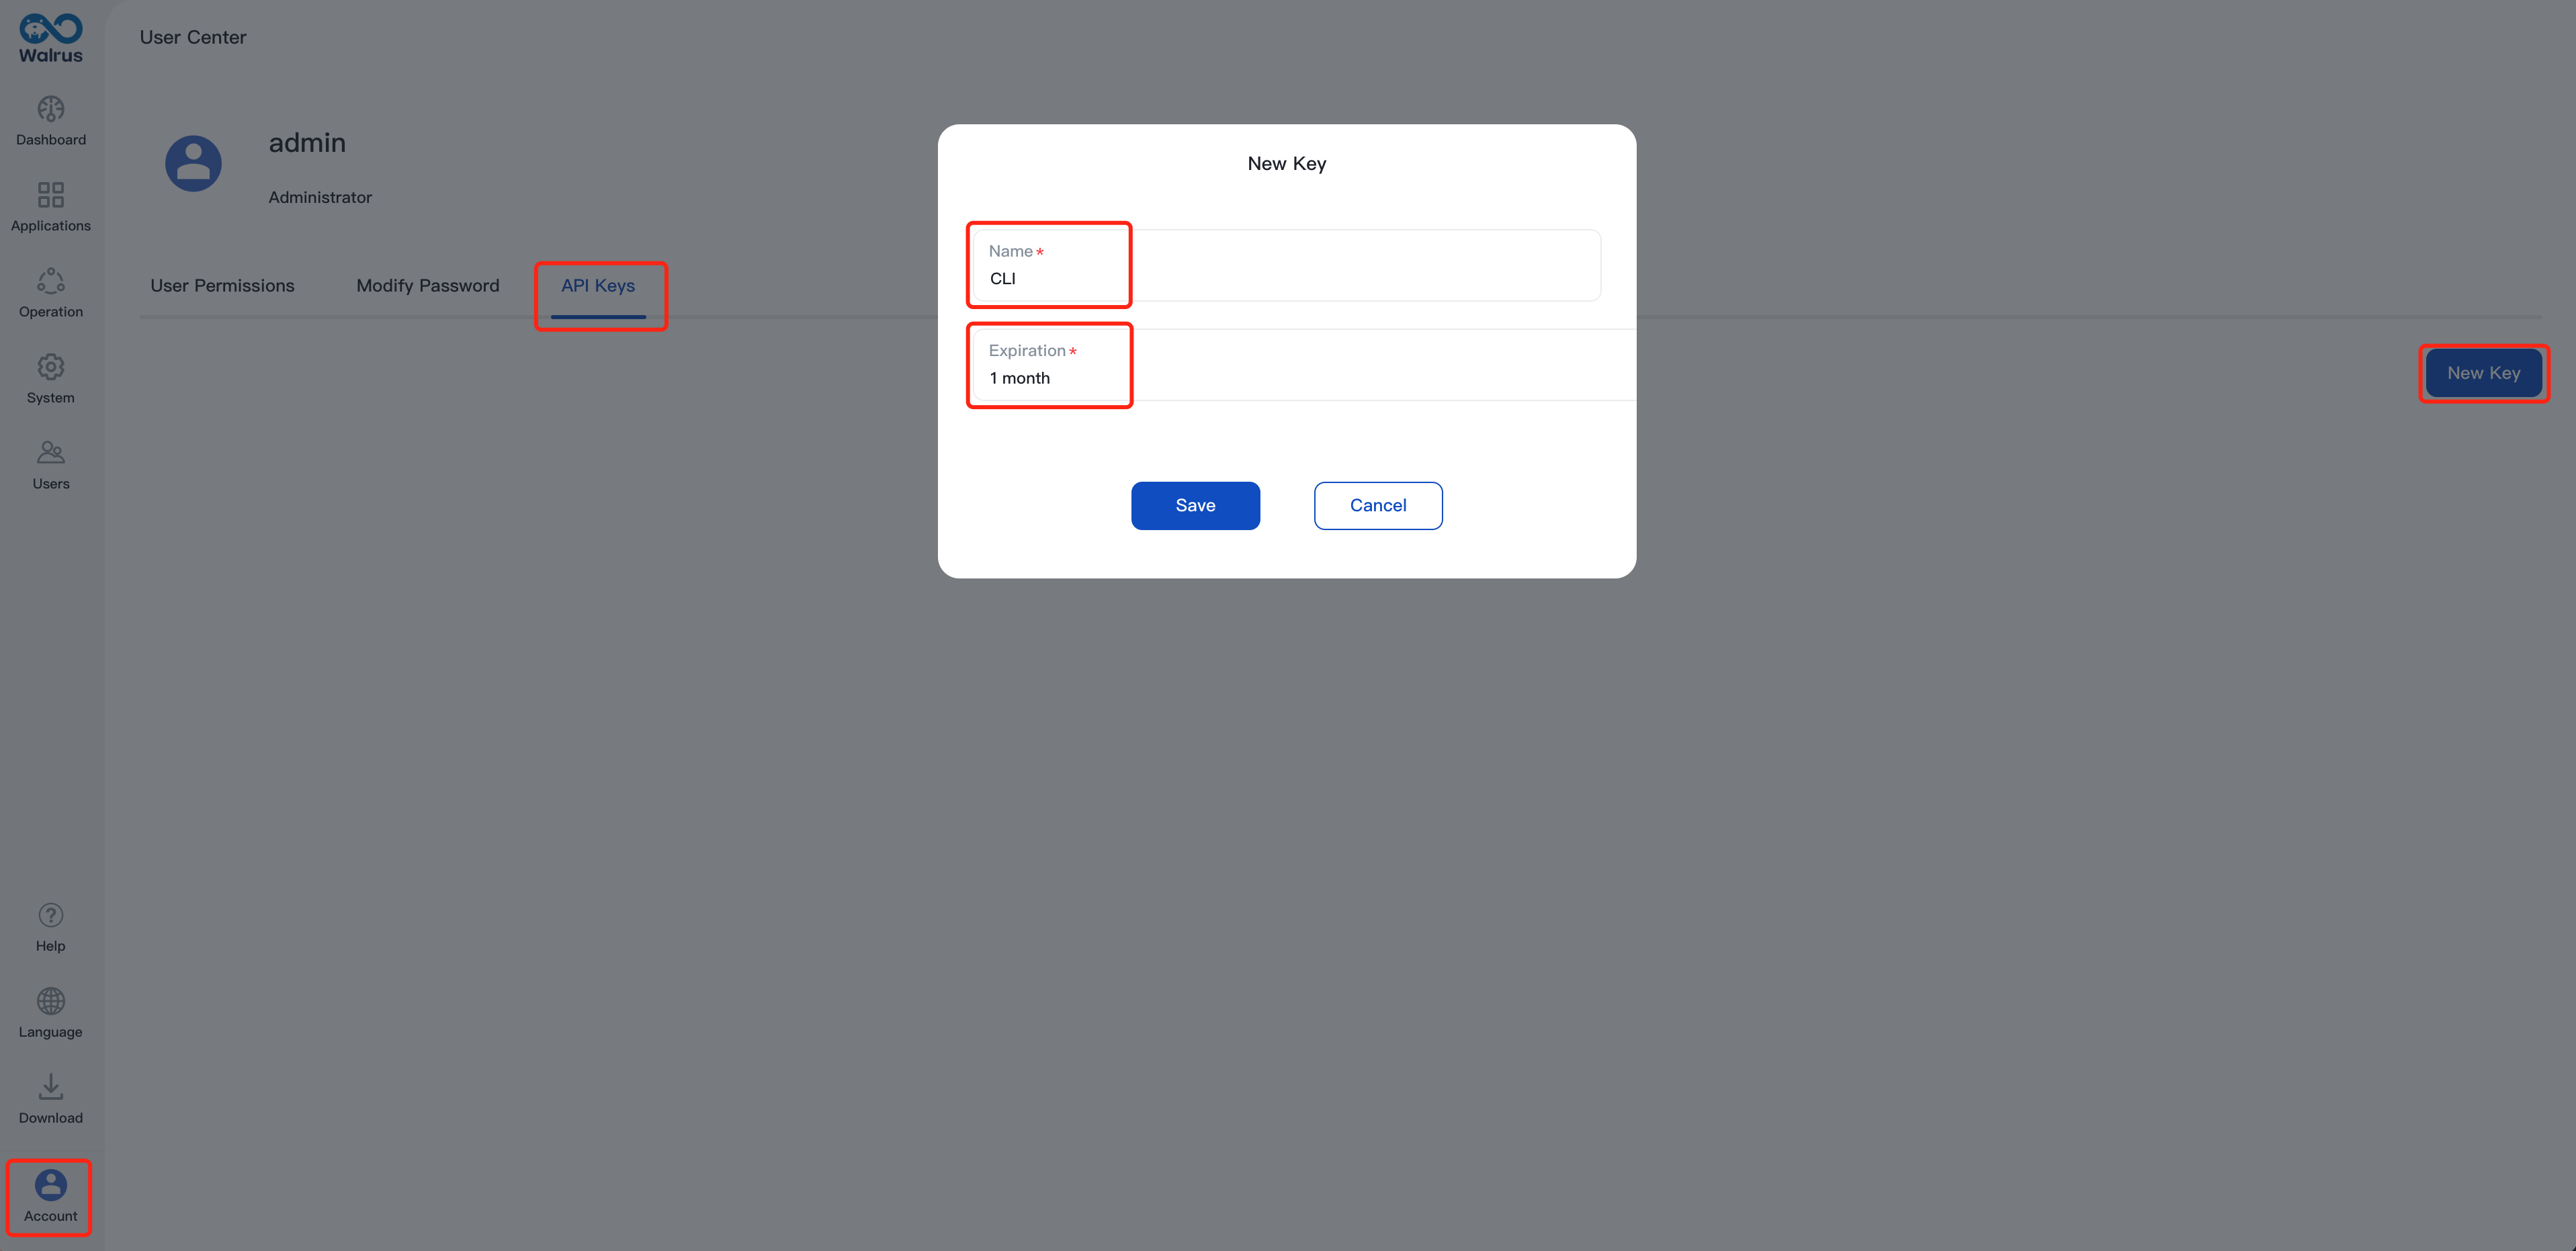
4. Create an API key on Walrus to authenticate for communication between the Walrus CLI and Walrus Server within the following steps. Right here is the steering:
- Navigate to
Account>Consumer heart>API Keys - Click on
New Key, identify it, and arrange an expiration - After configuring, copy the generated key and put it aside. If the hot button is misplaced sooner or later, it may be regenerated for substitute.
Configure Walrus CLI and Combine It With GitLab CI
On this part, we are going to exhibit an instance from CI to CD. Observe the steps under to combine Walrus CLI with GitLab CI:
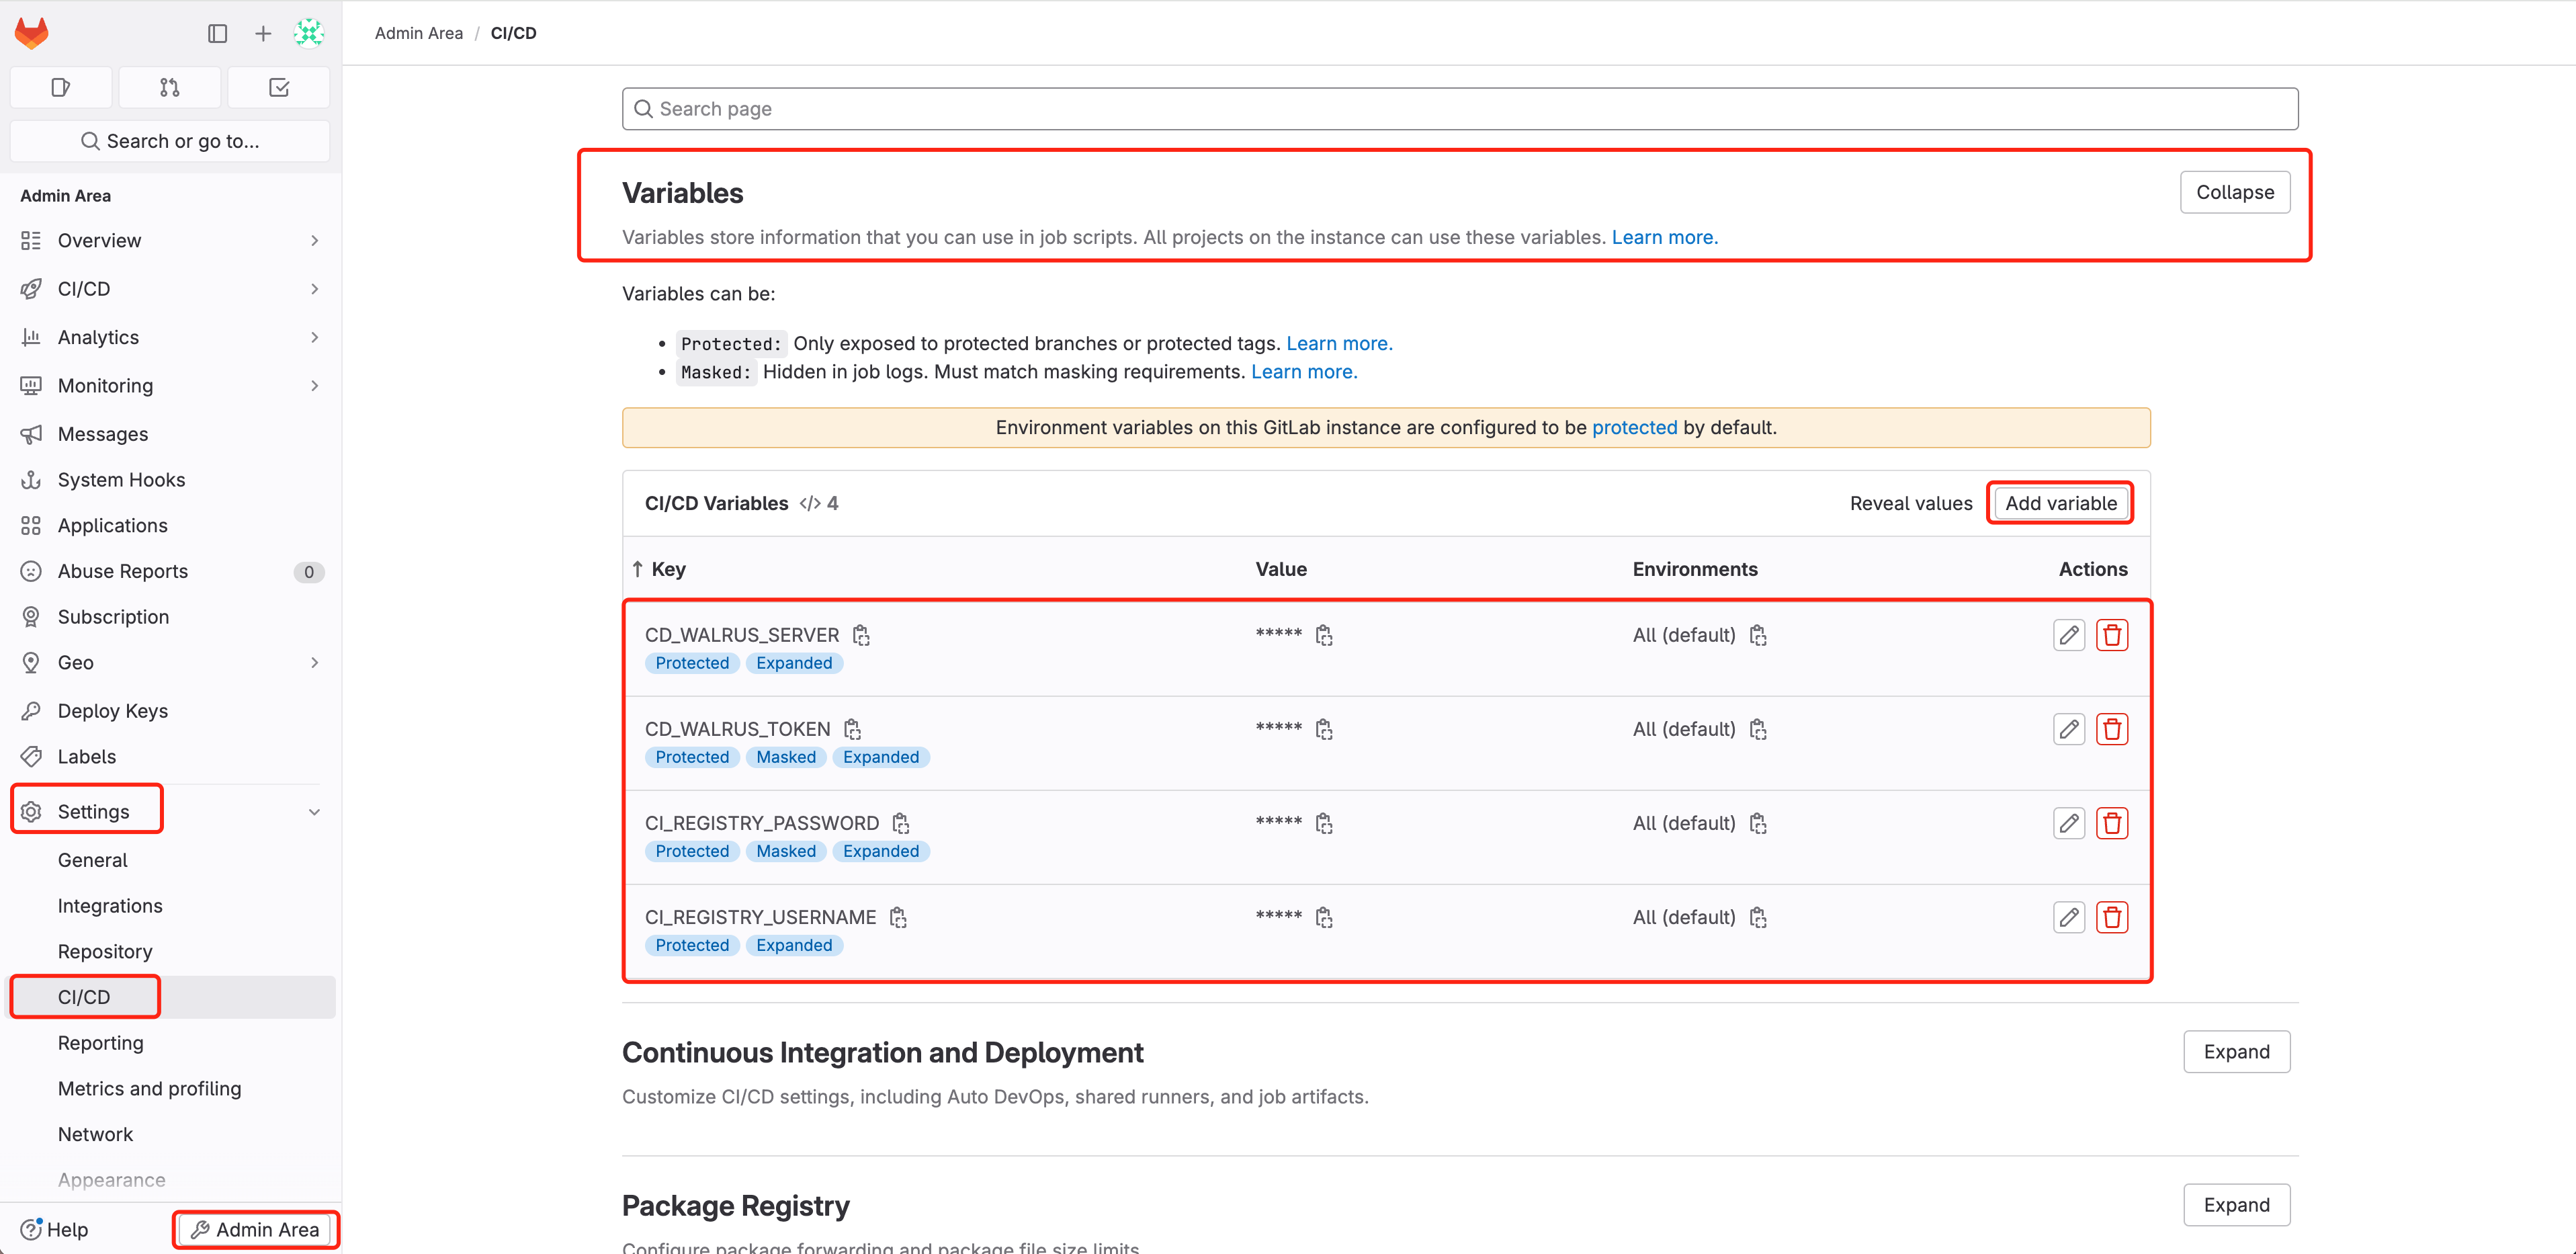
- Entry GitLab and navigate to
Admin Space > Settings > CI/CD > Variables - Add the next variables and configure the delicate data that’s required by GitLab CI execution:
CI_REGISTRY_USERNAME: The username of the CI construct container picture to push to Docker Hub; seek advice from docker login.CI_REGISTRY_PASSWORD: The password of the CI construct container picture to push to Docker Hub; seek advice from docker login.CD_WALRUS_SERVER: The URL that Walrus accesses, whose format is https://domain:port.CD_WALRUS_TOKEN: API Keys of Walrus for authentication.
3. Create .gitlab-ci.yml file within the GitLab venture (exists by default within the pattern venture), which is able to outline your CI/CD workflow. Under is a pattern .gitlab-ci.yml file for deploying the pattern venture Recreation 2048. You may copy and modify it as wanted, corresponding to altering the picture sealdemo/game2048 to your individual picture identify.
levels:
  - compile
  - construct
  - deploy

variables:
  CI_PROJECT_DIR: ./
  CI_IMAGE_NAME: sealdemo/game2048
  CD_WALRUS_PROJECT: default
  CD_WALRUS_PROJECT_ENV: native

compile:
  stage: compile
  picture: maven:3-openjdk-8
  artifacts:
    paths:
      - goal/
  script:
    - mvn clear bundle

construct:
  dependencies:
  - compile
  stage: construct
  picture:
    identify: gcr.io/kaniko-project/executor:debug
    entrypoint: [""]
  artifacts:
    paths:
      - goal/
  before_script:
    - mkdir -p /kaniko/.docker
    - echo "{"auths":{"https://index.docker.io/v1/":{"auth":"$(printf "%s:%s" "${CI_REGISTRY_USERNAME}" "${CI_REGISTRY_PASSWORD}" | base64 | tr -d 'n')"}}}" > /kaniko/.docker/config.json
  script:
    - /kaniko/executor
      --context "${CI_PROJECT_DIR}"
      --dockerfile "${CI_PROJECT_DIR}/Dockerfile"
      --destination "${CI_IMAGE_NAME}:${CI_COMMIT_SHORT_SHA}"

deploy:
  stage: deploy
  picture: alpine
  before_script:
    - wget -O walrus --no-check-certificate "${CD_WALRUS_SERVER}/cli?arch=amd64&os=linux"
    - chmod +x ./walrus
  script:
    - ./walrus login --insecure --server ${CD_WALRUS_SERVER} --token ${CD_WALRUS_TOKEN}
    - ./walrus apply -f ./walrus-file.yaml -p ${CD_WALRUS_PROJECT} -e ${CD_WALRUS_PROJECT_ENV}
4. Try walrus-file.yaml, which Walrus makes use of to deploy purposes (already exists by default within the pattern venture). Walrus file is a concise YAML construction that describes the applying’s deployment configuration. You may make any essential modifications to this file:
model: v1
sources:
- identify: game2048
kind: containerservice
attributes:
containers:
- profile: run
picture: ${CI_IMAGE_NAME}:${CI_COMMIT_SHORT_SHA}
ports:
- schema: http
exterior: 8080
inner: 8080
protocol: tcp
sources:
cpu: 0.25
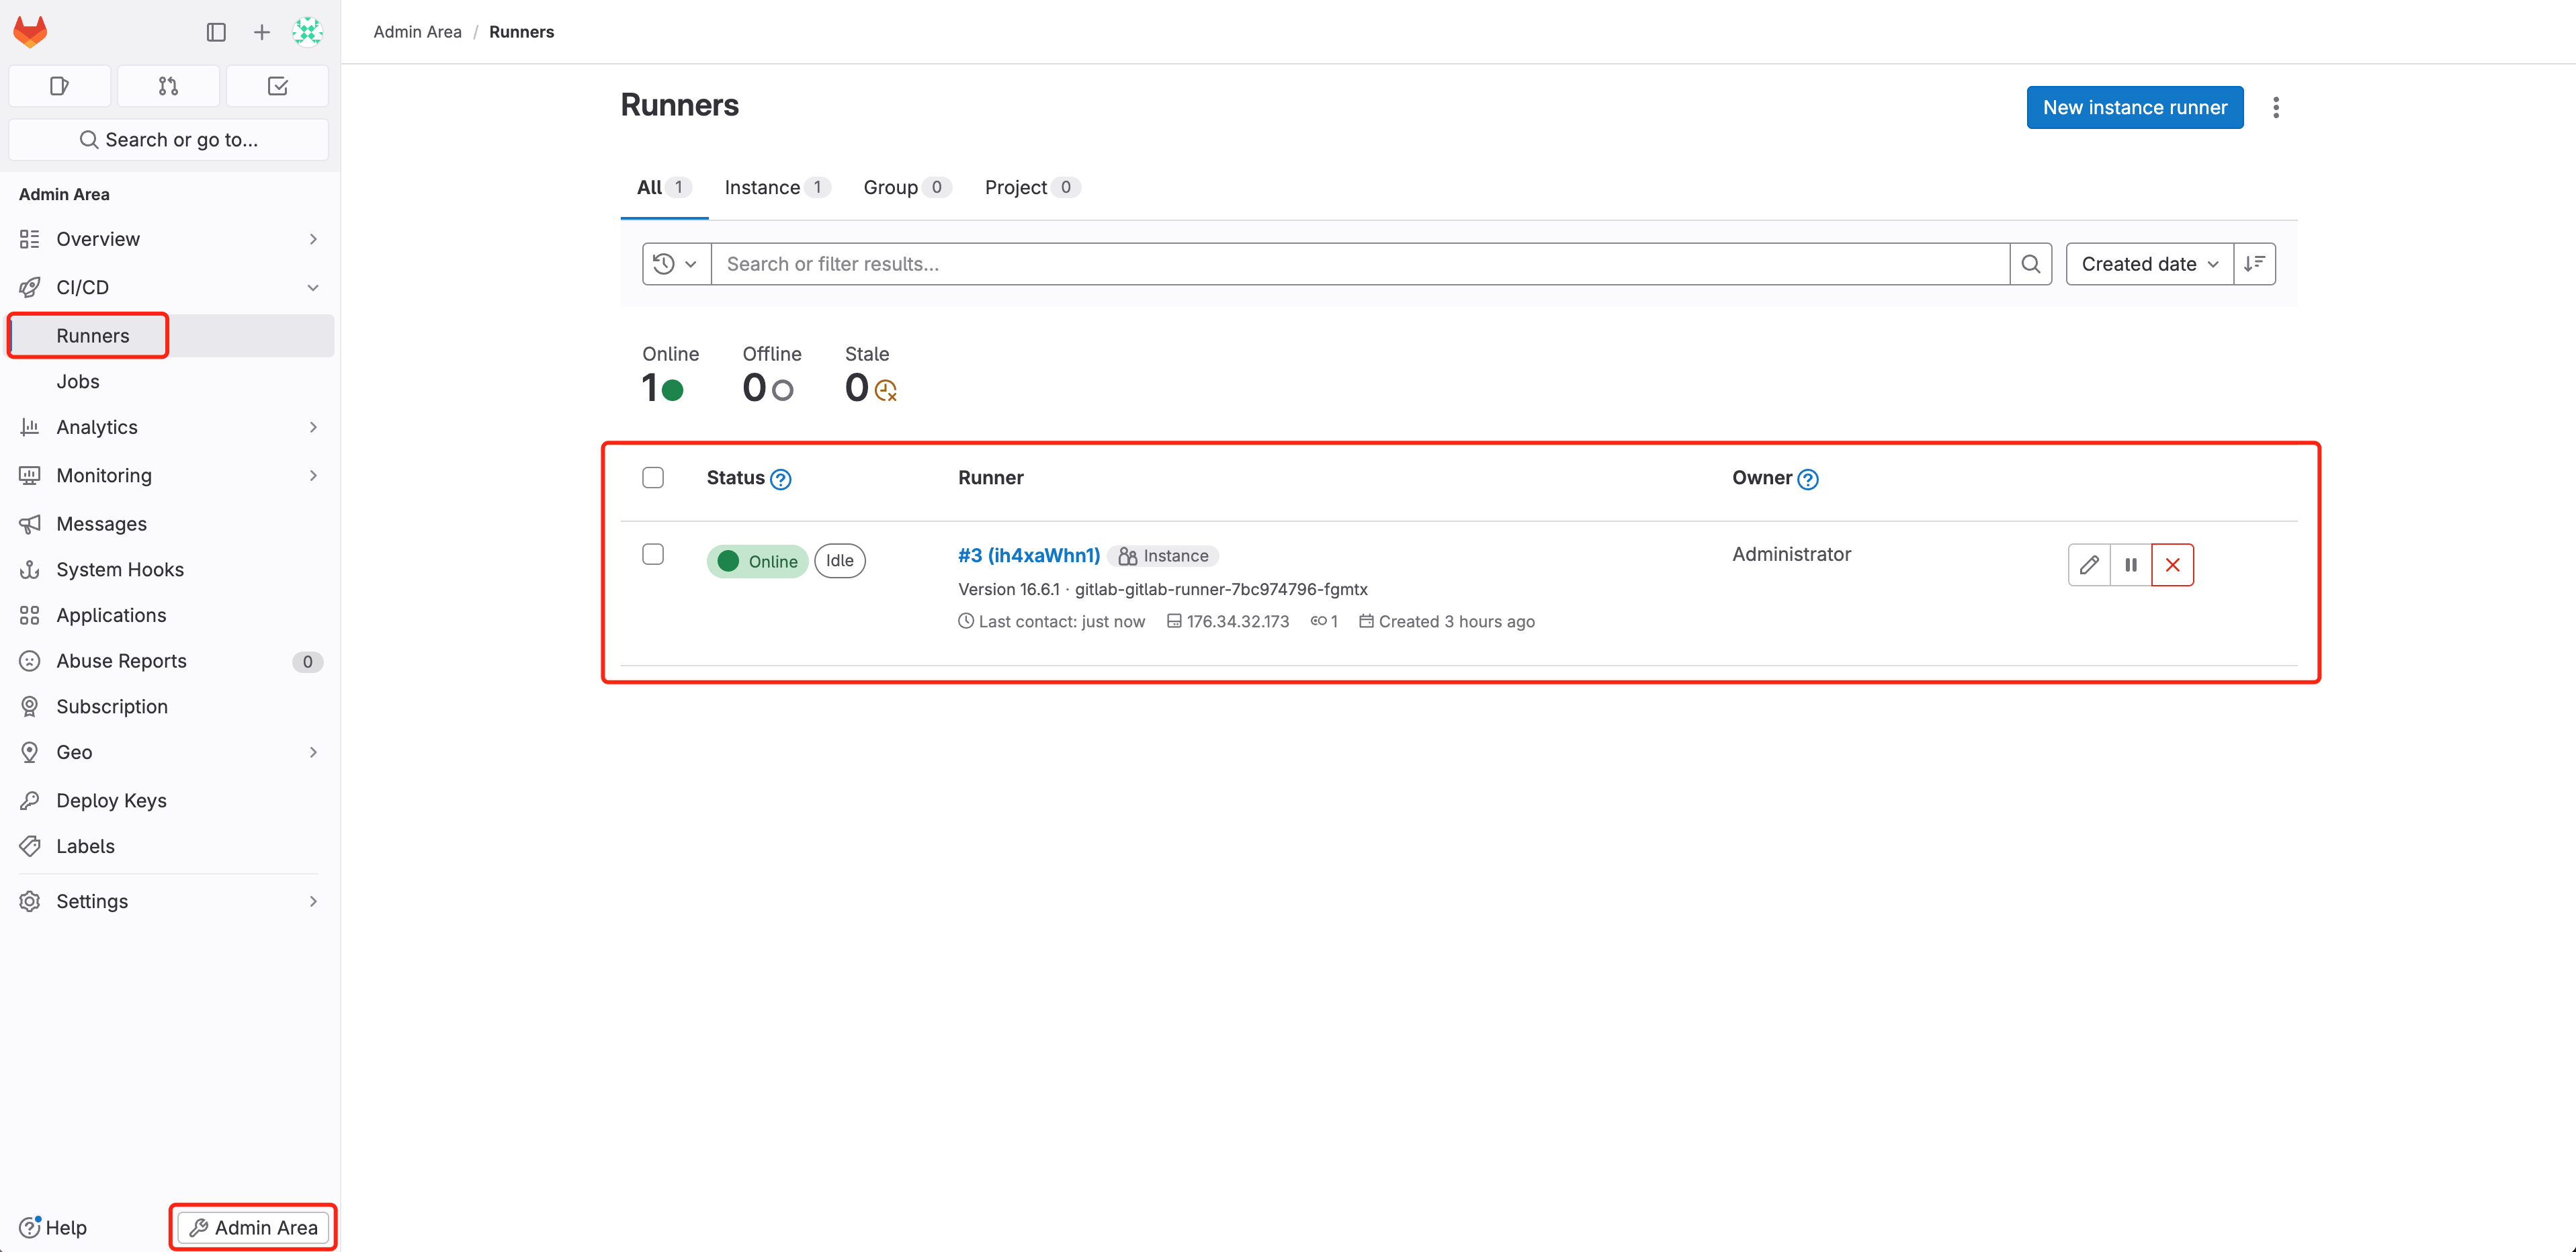
reminiscence: 5125. Entry GitLab, navigate to Admin Space > CI/CD > Runners, verify that GitLab Runner is on-line correctly(how to install GitLab Runner), which is used to run the CI/CD pipeline outlined by .gitlab-ci.yml:
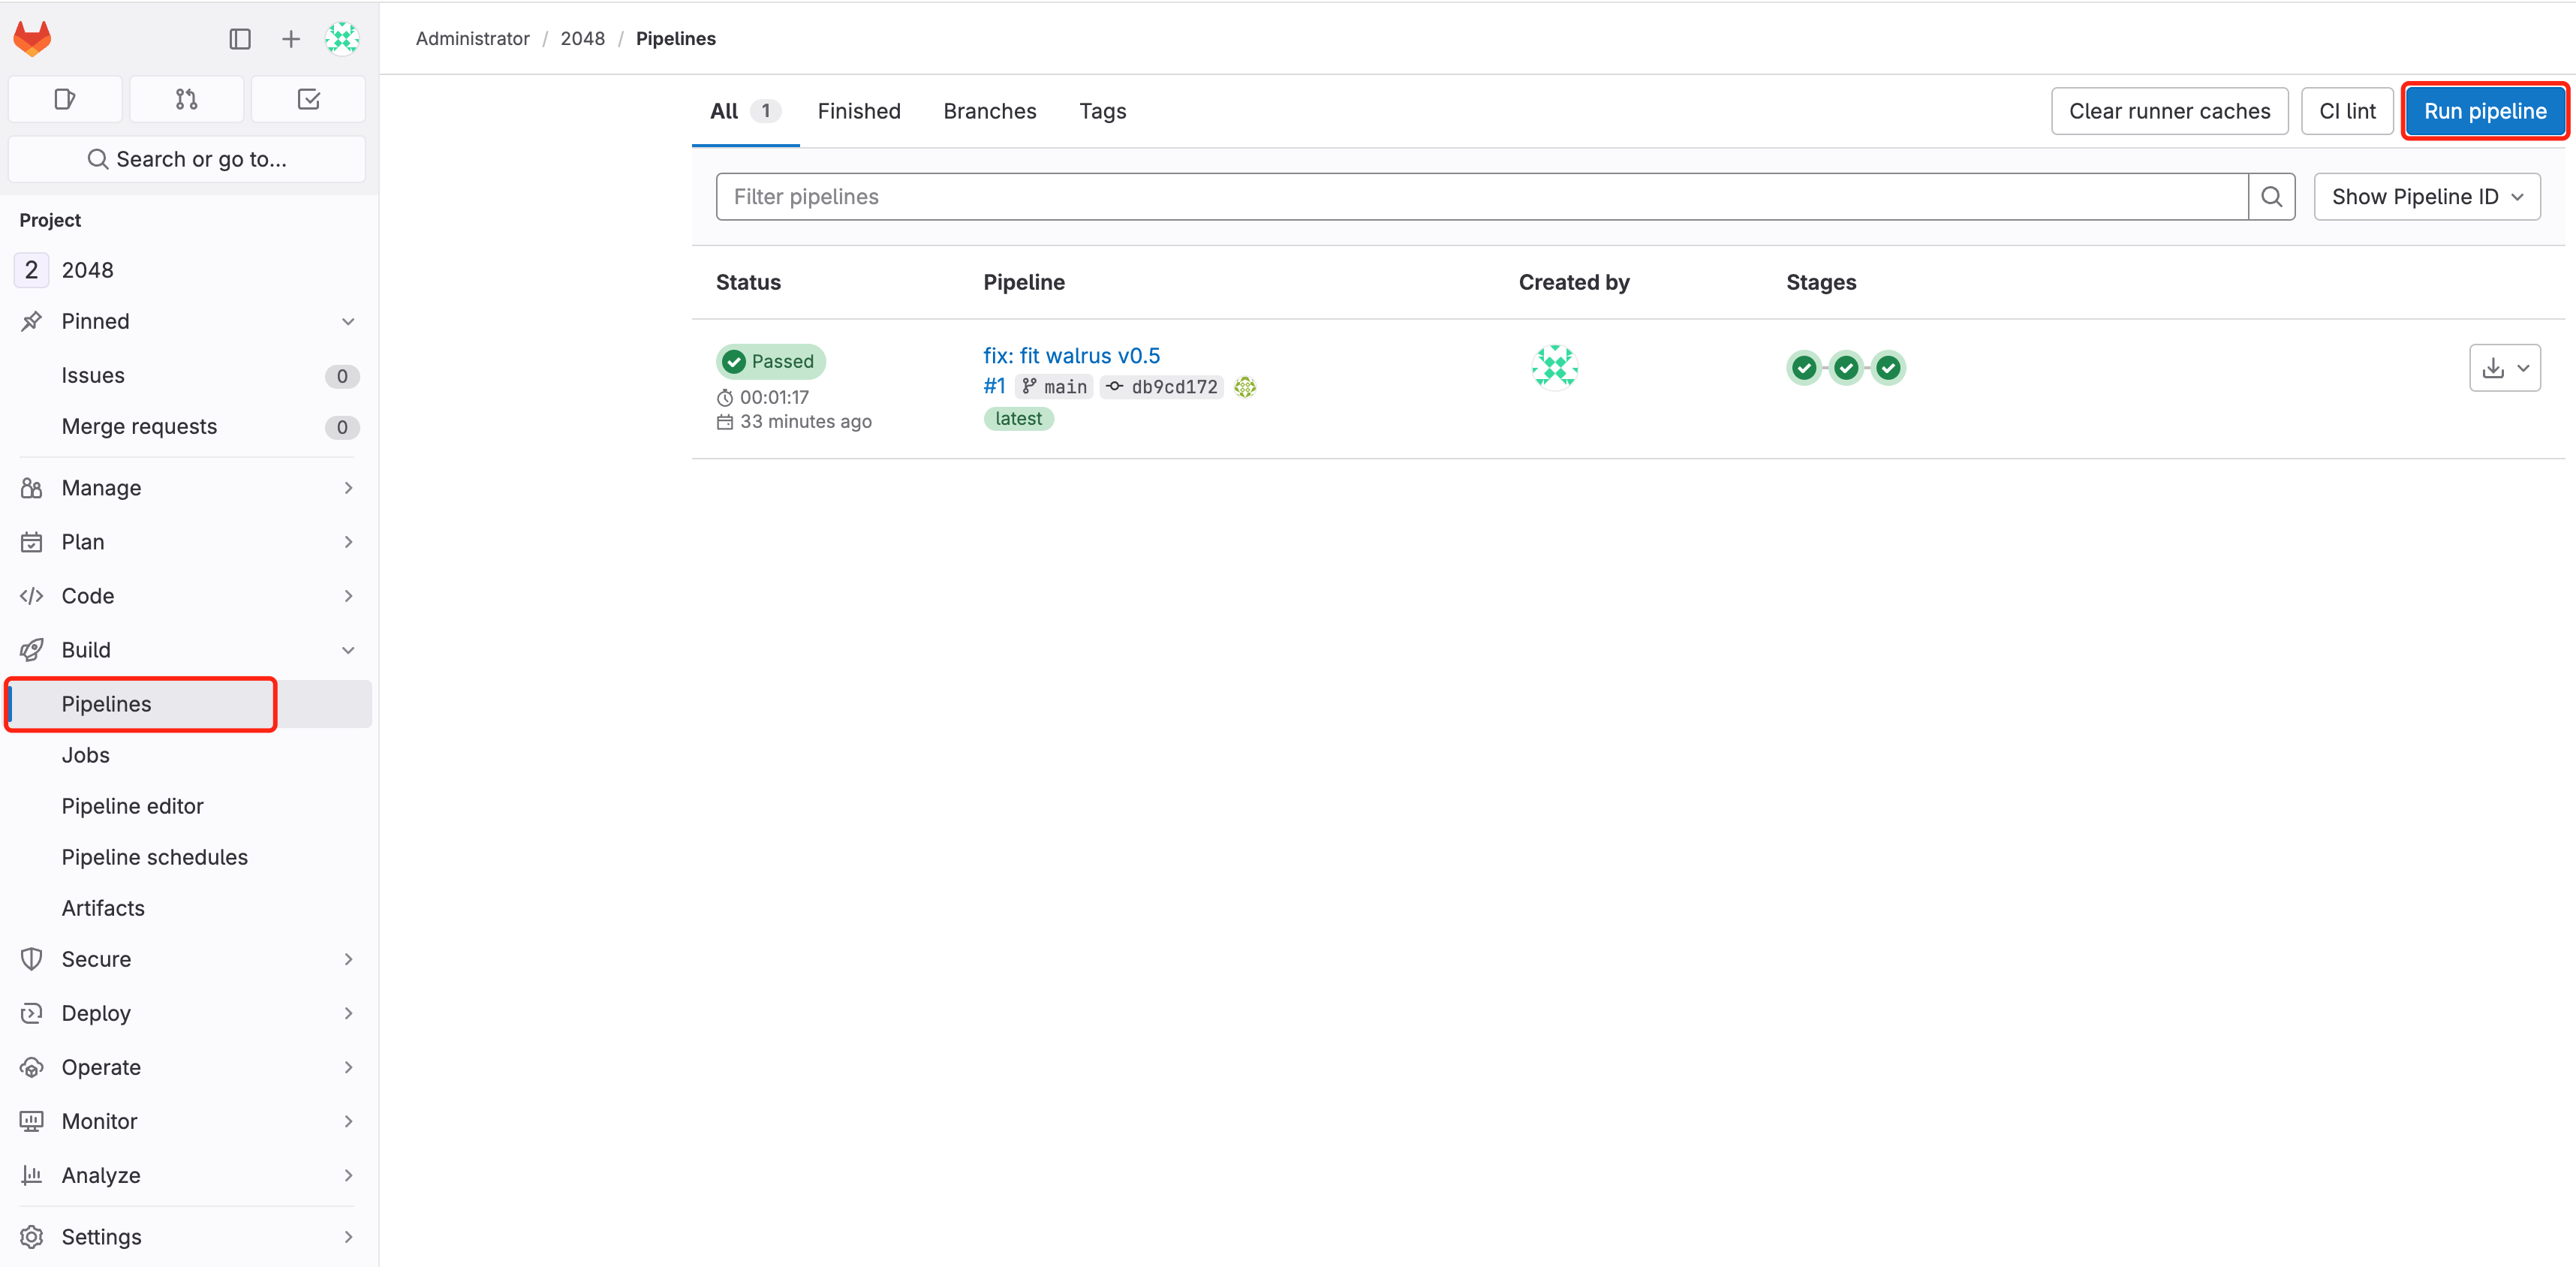
6. Navigate to 2048 Mission > Construct > Pipelines, choose Run pipeline
Await the pipeline to complete working and verify the outcomes of the pipeline run: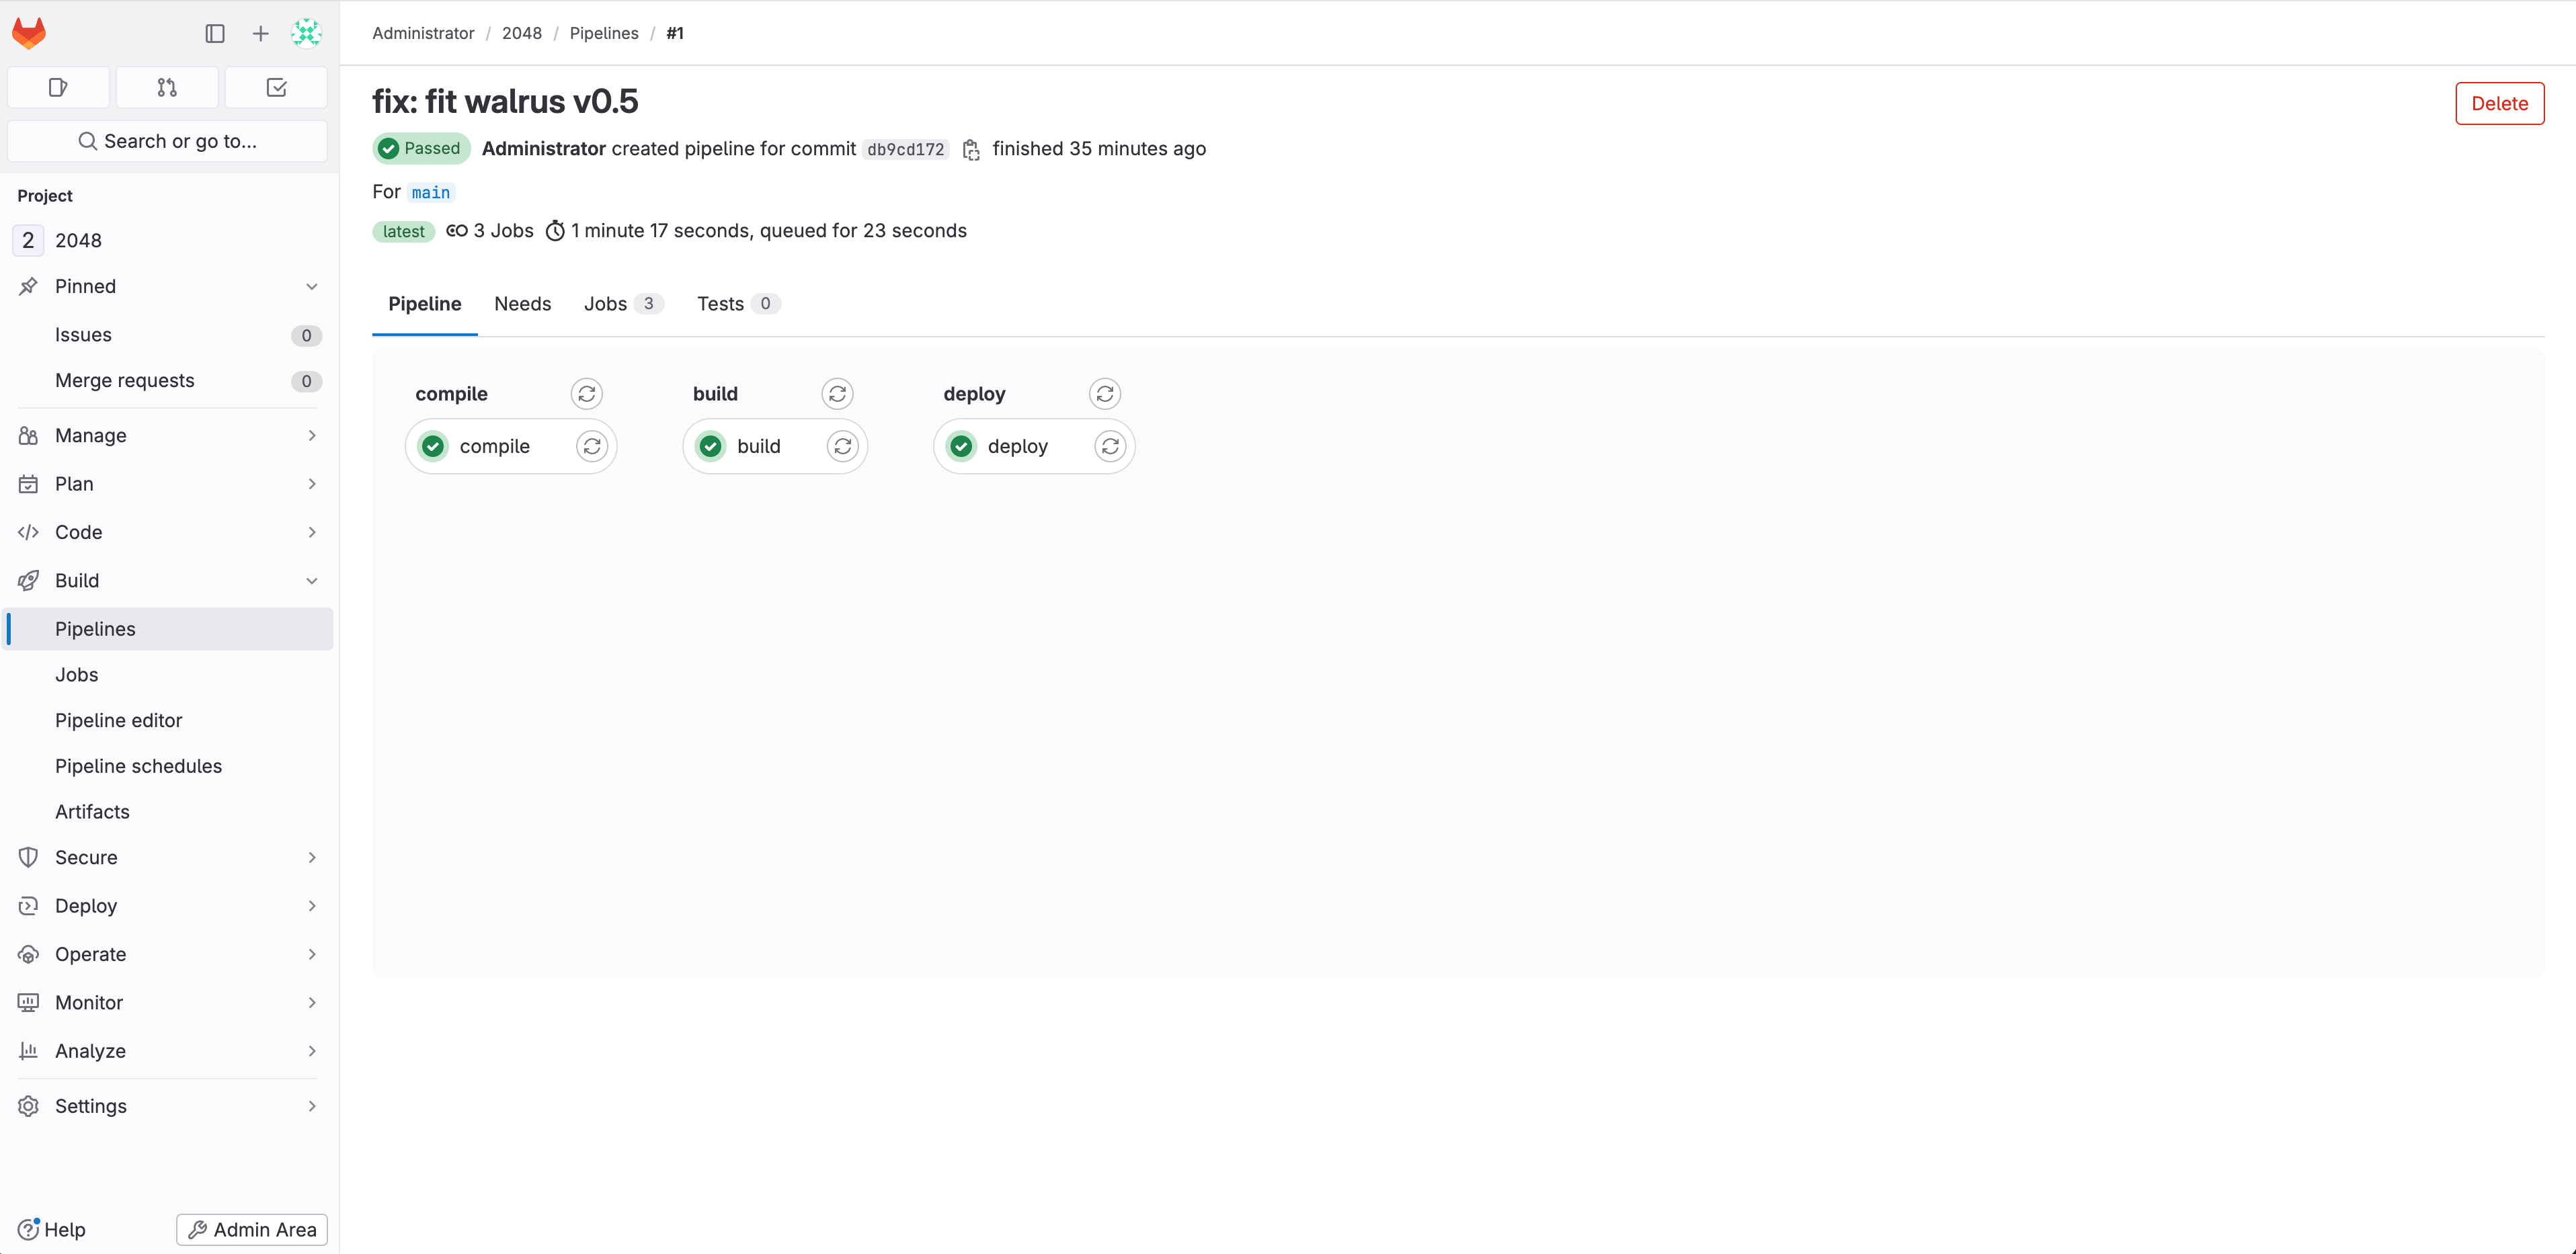
View the pipeline’s working logs:
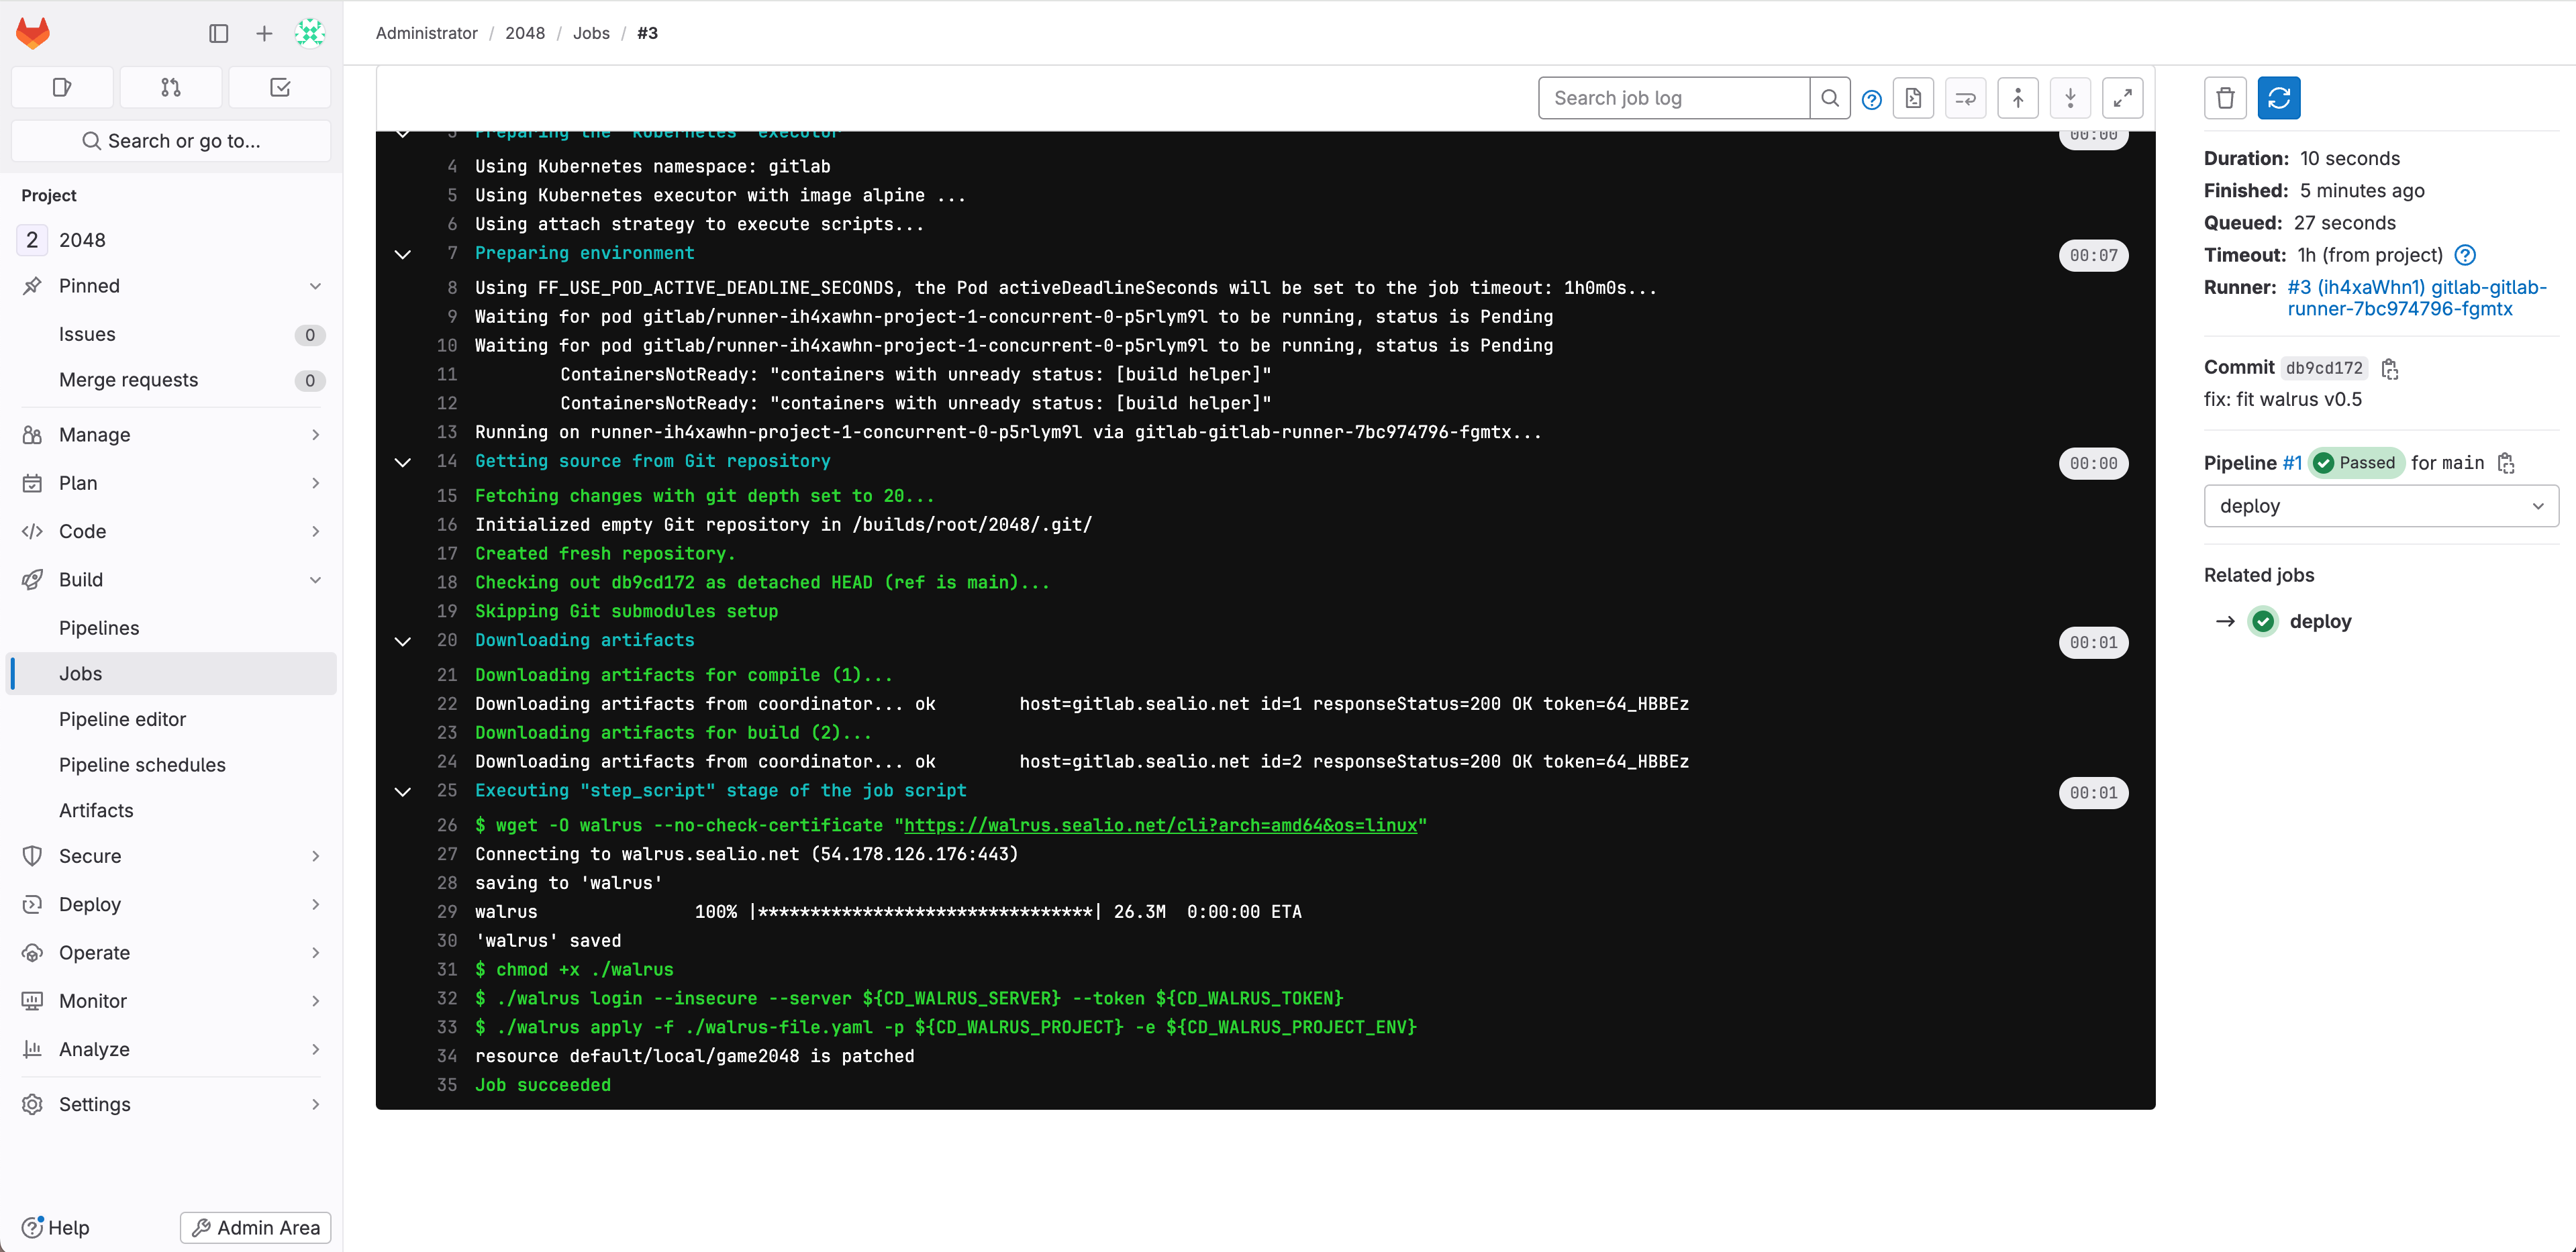
The logs point out that the pipeline ran efficiently. GitLab CI accomplished the CI/CD steps of Maven construct, container picture construct add, and software deployment to the K3s cluster utilizing the Walrus CLI in that particular order.
7. After efficiently working the pipelines, you’ll be able to go to Walrus to view the deployed game2048 software!
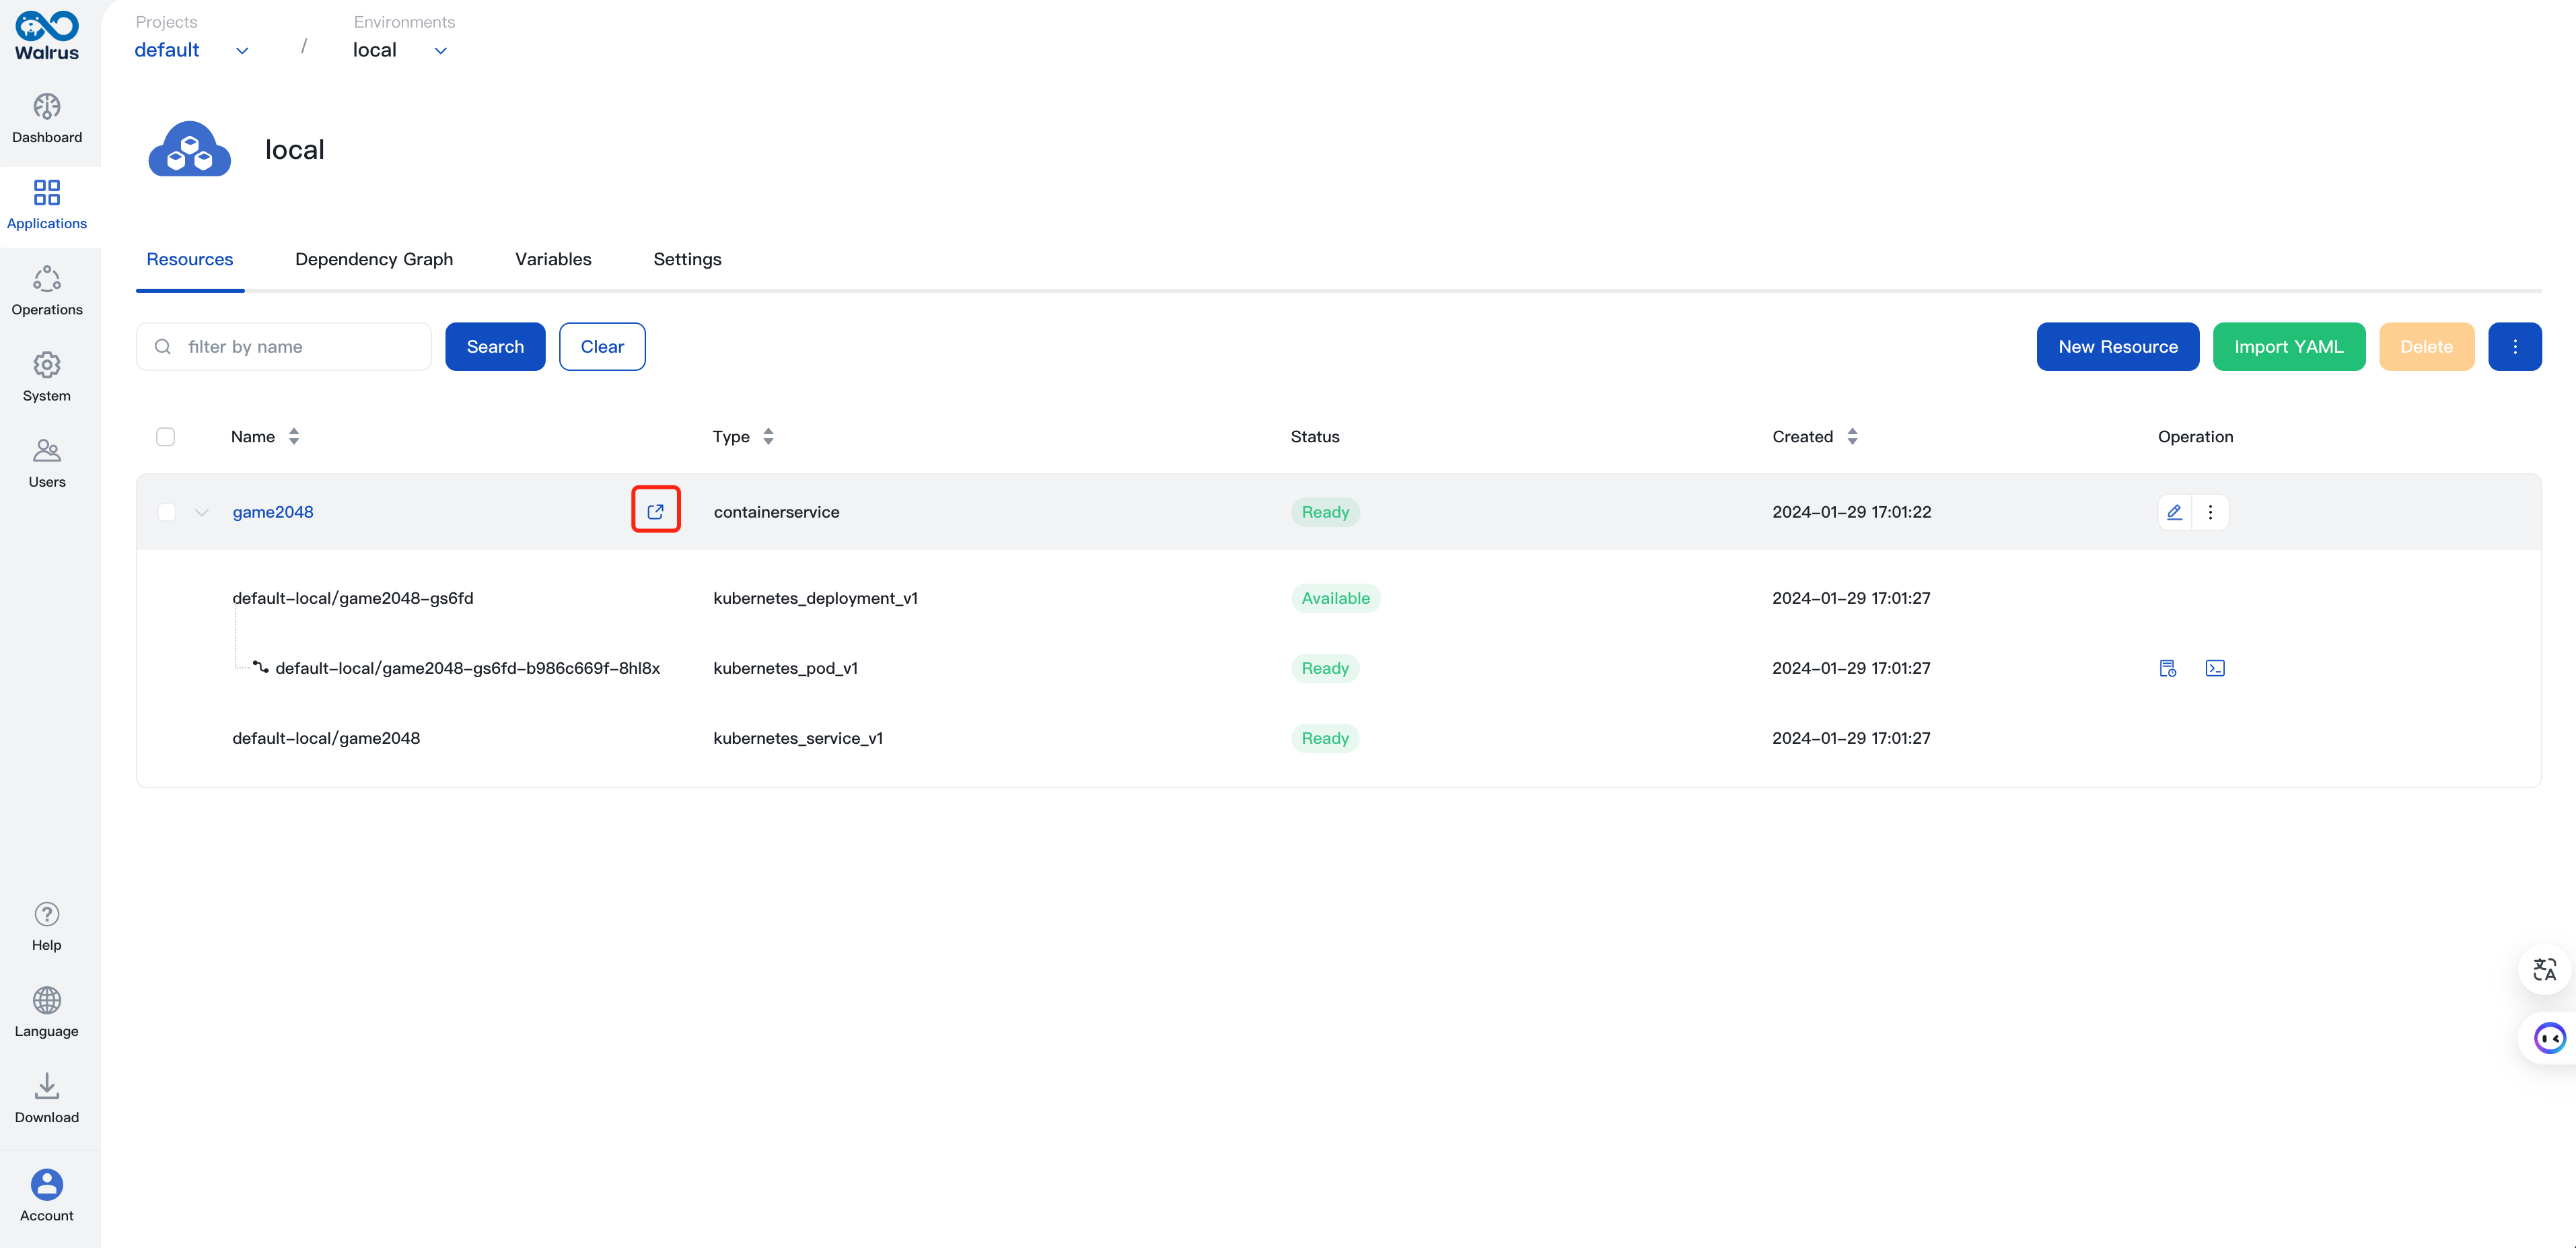
Entry the 2048 sport by utilizing the routinely acknowledged endpoints and the /2048 path. Right here is the complete URL: http://domain:port/2048.

Now, we’ve got efficiently built-in Walrus CLI with GitLab CI. Through the use of the Walrus file in Walrus 0.5.x, builders can now automate the deployment of purposes in a extra user-friendly means when committing software code to GitLab.
With XaC (Every thing is Code), Walrus can unify and handle the whole software lifecycle, from the provisioning of infrastructure sources to releasing the upper-tier software.
This tutorial solely covers one state of affairs. In case you are serious about studying extra, you’ll be able to discover different situations with Walrus, corresponding to provisioning Kubernetes clusters, creating cloud RDS databases, and configuring LB insurance policies.


