
Relating to IT Infrastructure, there are a number of parts that play an important position in a profitable deployment, storage is one such element and it performs a vital position in conserving the info secure and safe. Understanding various kinds of storage configurations is essential and as we speak we’ll focus on how we will obtain redundancy and efficiency by utilizing RAID arrays. RAID stands for Redundant Array of Cheap/Unbiased Disks and RAID helps numerous varieties of configuration and on this article, we’ll give attention to {hardware} RAID10 setup on DELL servers and in case you are new to RAID and want to study extra about it please undergo this information.
Step 1
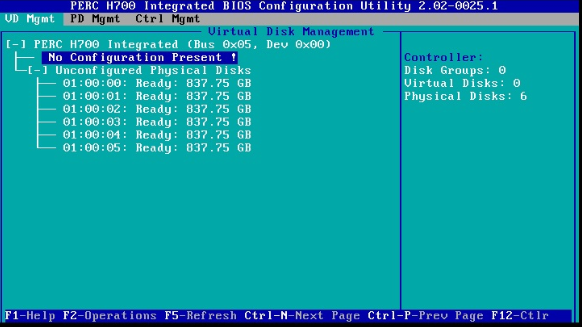
Boot the server and wait till you see the choice to enter into RAID configuration <Ctrl + R> and once you enter into the configuration menu navigate via VD mgmt and PD mgmt screens and search for the out there bodily disks on the server. 
Step 2
On the VD mgmt display -> choose "No Configuration Current !" and press F2
Step 3
Choose "create new VD"
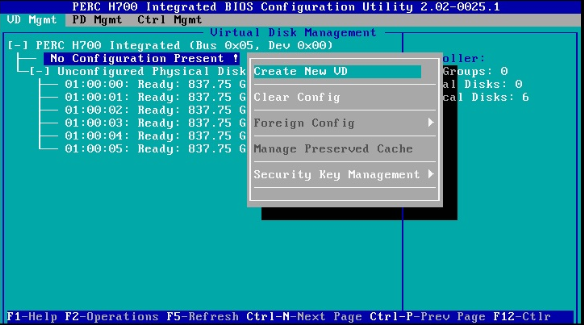
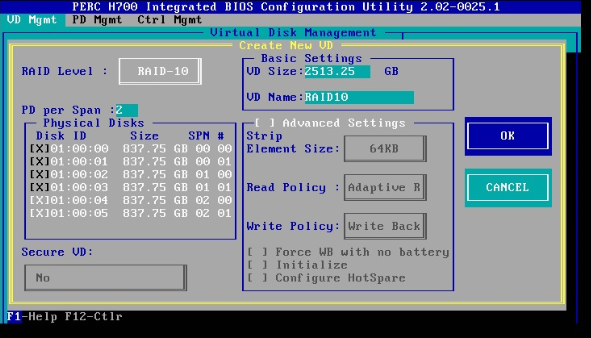
You will be offered with the beneath display:
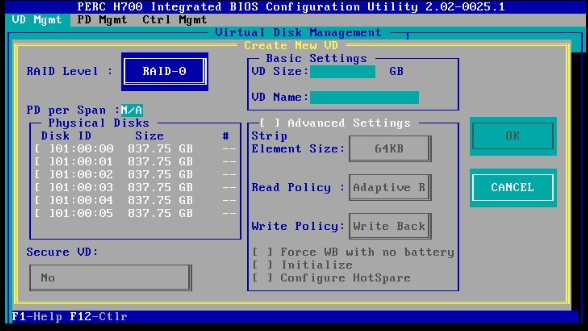
Step 4
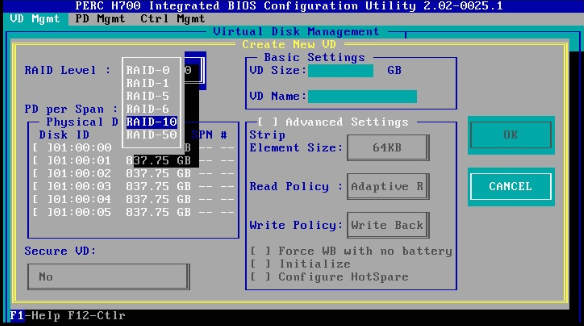
Choose the required RAID stage by clicking on the RAID stage button (Press Enter to pick RAID stage choices).
On this instance, I’m creating RAID10 which requires a minimal of 4 disks.
As I’m creating it as a single quantity, deciding on all of the out there disks for RAID10
Step 5
Choose the required disks and for choosing the disks use the spacebar key.

Observe the usable house/VD measurement as per the RAID stage after deciding on the disks.
Step 6
Enter the VD title in VD title area. 
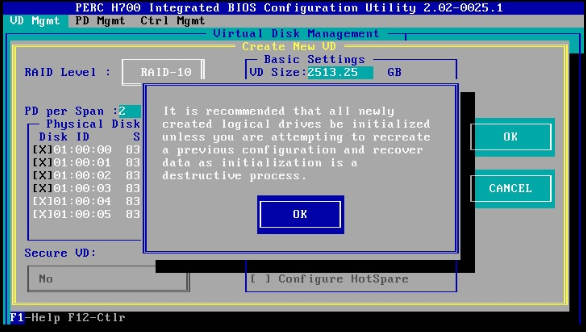
Step 7
Click on on OK button, and click on OK if prompted for initializing the newly created logical drives.
That is all and you might be achieved with the RAID setup, now you can reboot the host, and RAID configuration will persist throughout host reboots.
As soon as the system is again up, you possibly can connect with the host utilizing your terminal to configure the Filesystem. You will discover the out there disks by utilizing fdisk -l command and that ought to listing the out there disks in your system, you possibly can partition the drive utilizing the identical fdisk command and on this case, I set it up as an LVM partition by working the beneath instructions so as.
fdisk /dev/sda
n # choose n for creating a brand new partition

p # major partition

Partition quantity (1-4): 1 # specify a partition quantity and press enter twice, by default the primary and final cylinders of the out there house will allotted to the brand new partition and at this level your partition is prepared however earlier than we exit the setup, we have to change the partition sort

Command (m for assist): t # t is chosen to alter to a partition’s system ID, on this case we modify to '1' which is the one we simply created.

Partition quantity (1-5): 1

Hex code (sort L to listing codes): 8e # Then hex code ’8e’ was entered as that is the code for a Linux LVM which is what we would like this partition to be, Linux LVM permits us to develop the disk on-line with out requiring a reboot.
Modified system sort of partition 1 to 8e (Linux LVM)

‘w’ is used to jot down the desk to disk and exit, mainly all of the modifications which have been achieved can be saved after which you may be exited from fdisk.
As soon as the partition is created now you can format and mount utilizing the instructions beneath.
pvcreate /dev/sda1 # Creating phyiscal quantity

vgcreate vg_raid10 /dev/sda1 # Creating Quantity group

lvcreate -l 100percentFREE -n lv_raid10 vg_raid10 # To allocate 100% of the out there house to the lvm

mkfs.xfs /dev/vg_raid10/lv_raid10 # Create XFS file system on lvm parition

#Create a listing below root and mount utilizing mount command or replace /and so on/fstab for everlasting mounting

mkdir /data-raid10

mount /dev/vg_raid10/lv_raid10 /data-raid10


# Edit /and so on/fstab and insert the beneath line:

/dev/vg_raid10/lv_raid10 /data-raid10 xfs defaults 0 2


